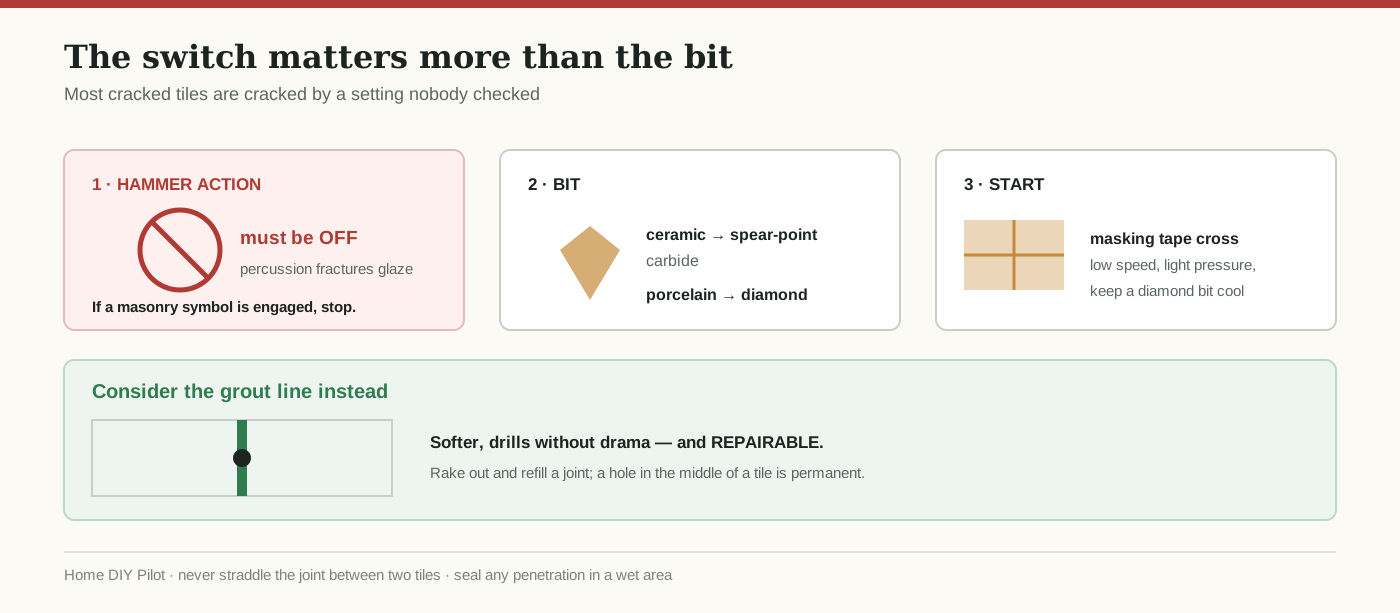
Most cracked tiles are not cracked by the bit. They are cracked by a switch on the drill that nobody thought to look at.
Combi drills sit in hammer mode because that is what you last used them for. Hammer action works by battering the bit forwards thousands of times a minute, which is excellent in masonry and catastrophic on a hard glazed surface that cannot flex. The tile does not wear away — it fractures, and the crack runs somewhere you did not choose.
Switch percussion off before the bit touches the tile. If your drill has a masonry symbol engaged, that is the whole article.
The bit matters nearly as much
A standard masonry bit is designed to chip its way through soft material. Glaze is harder than it is, so it skates, generates heat, and eventually punches through in an uncontrolled way.
Use a spear-point carbide tile bit for ordinary glazed ceramic — the arrowhead grinds cleanly rather than chipping. For porcelain, which is considerably harder and denser, a diamond-tipped bit is the realistic choice; a spear point will dull on it and start generating the heat that cracks tiles.
If you do not know which you have, porcelain is typically heavier, denser, and shows the same colour through the body at a chip, where ceramic usually shows a paler biscuit under the glaze.
Stopping the bit from wandering
A spinning bit on a glazed surface skids, and the scratch it leaves across the tile is permanent even if the hole ends up fine.
Two low-tech fixes work. Put a cross of masking tape over the mark and drill through it — the tape gives the tip something to bite. Or make a tiny starting nick in the glaze with a sharp centre punch, using very light taps, which is effective but carries its own risk on thin tile.
Start the drill slowly. Low speed, light steady pressure, and let the bit cut. Leaning on it is the second most common way to crack a tile after hammer mode.
Heat is the invisible failure
Diamond bits in particular need cooling. Dry-drilling porcelain builds heat quickly, which dulls the bit and stresses the tile.
A sponge held under the hole, a squirt bottle, or a small dam of plumber's putty holding water around the drill point all work. Pause every few seconds rather than pushing straight through — the pause matters more than the volume of water.
The alternative worth considering first
Here is the position most guides skip: for many bathroom fixings, drill the grout line instead of the tile.
Grout is softer, far more forgiving, drills without drama, and — the real advantage — it is repairable. Remove the fixing later and you rake out and refill a grout joint. Remove a fixing from the middle of a tile and you have a hole in a tile, permanently, unless you own a spare and are prepared to cut it out.
Grout lines will not always land where you need them, and a fixing straddling the joint between two tiles is worse than either option because it stresses both edges. But when the layout allows it, the grout line is the better target, and for renters it is often the only sensible one.
Once you are through
Behind the tile is adhesive, then substrate, and the substrate decides the fixing. Tile backer board and plasterboard are hollow-wall situations needing appropriate anchors; solid render or masonry takes a conventional plug.
Change to the correct bit for that material once the tile is penetrated — continuing with a diamond bit into masonry is slow and wastes an expensive tool.
Then think about water. Any penetration through tile in a wet area is a route for moisture into the wall behind. Seal around the fixing with a suitable sealant, and be honest about whether this hole belongs in a shower enclosure at all.
Fixing into what is behind, without splitting the tile
The hole through the tile is the visible part; the fixing is the part that fails.
Drill the anchor hole slightly deeper than the plug needs, so the plug seats fully in the substrate rather than bottoming out and pushing back against the tile. Then let the plug sit behind the tile, not inside it — a plug expanding within the tile thickness is a wedge in a brittle material, which is a slow-motion crack.
Do not overtighten. The tile is not the structural element and should never carry clamping force; snug the screw until the fitting is firm and stop. A soft washer or the fitting's own gasket spreads what little load there is.
When not to drill
Stop if you do not know what is behind the wall in a bathroom — pipework runs where you would expect it to, and a drill through a supply pipe behind tile is a genuinely expensive afternoon.
Stop if the tile is already cracked or drummy, meaning it sounds hollow when tapped and has lost its bond. Drilling a loose tile usually finishes it.
And on a single irreplaceable feature tile, consider whether a well-chosen adhesive fixing rated for the weight would do the job, because the correct answer to "how do I drill this" is sometimes "do not."